
Daemonic Blood Lake - Video Tutorial
Floating Bloodfalls - Written Tutorial
Tools and Materials required
Tools
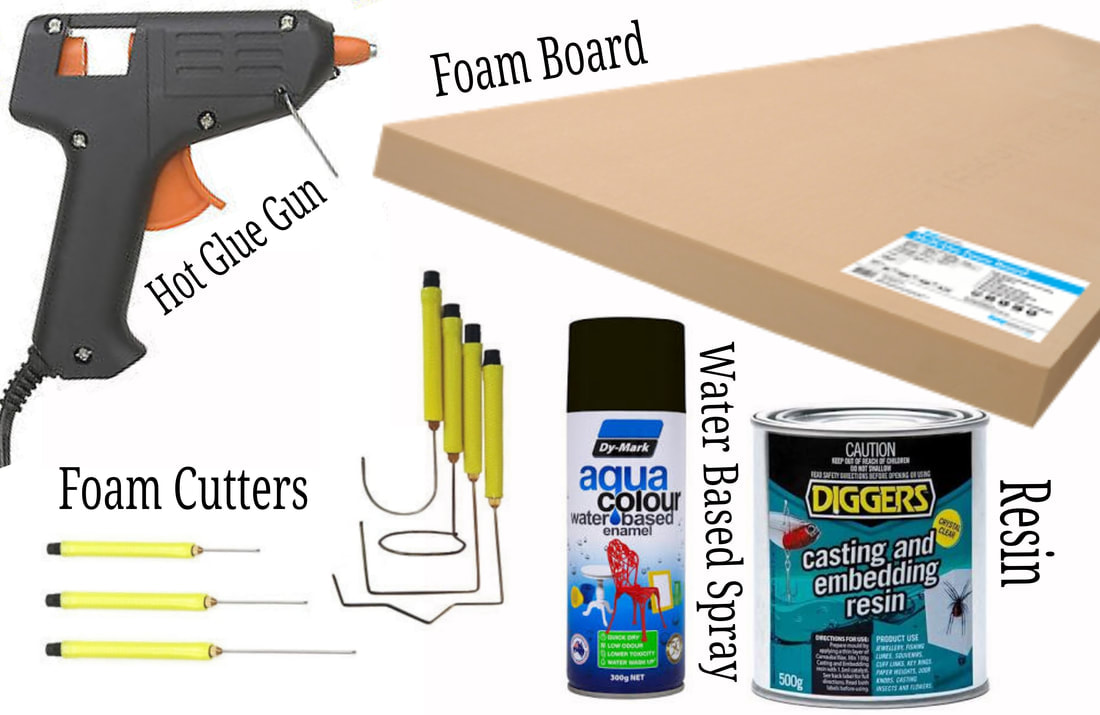
- Wire Cutter
- Hobby knife / Razor Blade
- Drill
- Hot Glue Gun
- Stirrer / cup (I used an old brush and spraycan lid)
Materials
- Aluminium Rod x 6
- 900mm x 1200mm Foam Board x 5
- Epoxy or Water Effects
- Water Based Black Spray Paint x 4
- PVA Glue
- Sand (finest grade possible, i used decorative)
Tools
- Wire Cutter
- Hobby knife / Razor Blade
- Drill
- Hot Glue Gun
- Stirrer / cup (I used an old brush and spraycan lid)
Materials
- Aluminium Rod x 6
- 900mm x 1200mm Foam Board x 5
- Epoxy or Water Effects
- Water Based Black Spray Paint x 4
- PVA Glue
- Sand (finest grade possible, i used decorative)
Step 1 - Planning
Three of the 900mm x 1200mm boards will line up to make a 6x4 table (it is about half an inch short due to the conversion from inches to mm.
The other 2 boards are for floating rocks and scatter terrain
Mark out on the boards with a black marker exactly where you want to cut your craters and floating rocks, we will add edges to the craters so remember they will be about an inch wider than the area you cut.
Step 2 - Cut and Paste
Scoop
Once you have marked out the areas you want to cut it is a simple matter of "Scooping" out the foam using the hot wire cutter. Ensure you do not scoop too deep, start with multiple shallow scoops to avoid this.
Scoop in multiple different directions and try to be as jagged and random with your movement as possible to ensure the foam has a rock-like texture. Simply move up and down, left and right while scooping.
Edging
Once you have your craters cut, take some of the offcuts and bits that you scooped out, break them up into smaller pieces and glue them in a random formation around the craters you created, then once the glue is dry you can use the wire cutter again to ensure they blend in with the edge of the crater
Sanding
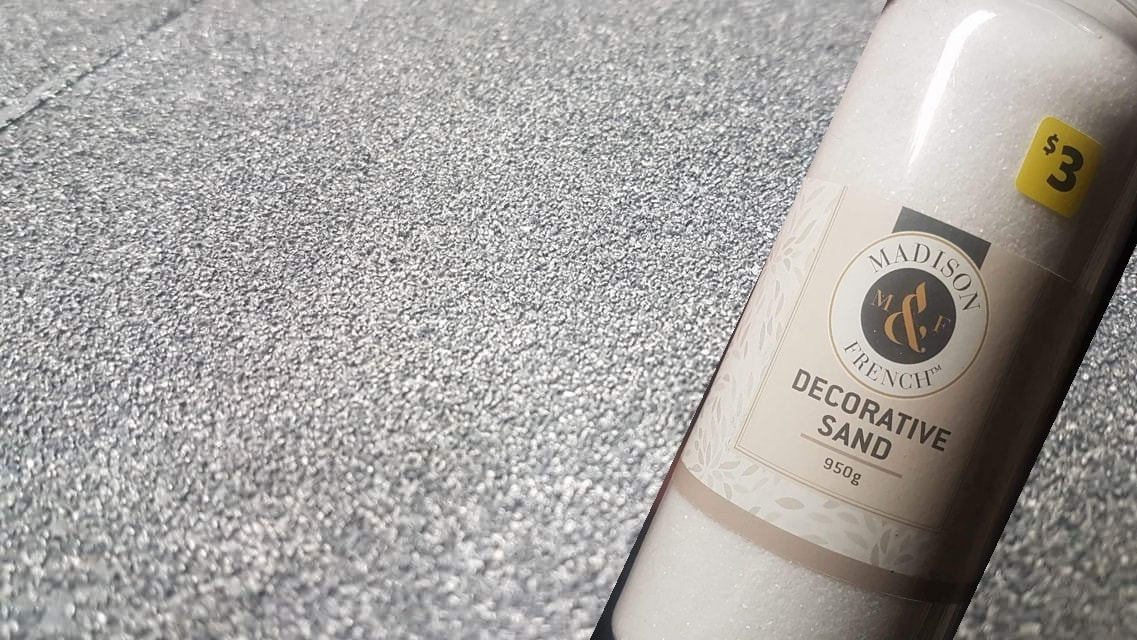
Now you want to add Texture to all flat surfaces of the table, to do this give the whole board a coat of slightly diluted PVA Glue, then sprinkle the sand over the top. You can be as heavy handed with the sand as needed at this stage.
Once the PVA is dry (allow overnight) use a stiff brush (`I used one from a dustpan) to brush away all excess sand. Be thorough as there is nothing worse than loose sand after you paint it
Scoop
Once you have marked out the areas you want to cut it is a simple matter of "Scooping" out the foam using the hot wire cutter. Ensure you do not scoop too deep, start with multiple shallow scoops to avoid this.
Scoop in multiple different directions and try to be as jagged and random with your movement as possible to ensure the foam has a rock-like texture. Simply move up and down, left and right while scooping.
Edging
Once you have your craters cut, take some of the offcuts and bits that you scooped out, break them up into smaller pieces and glue them in a random formation around the craters you created, then once the glue is dry you can use the wire cutter again to ensure they blend in with the edge of the crater
Sanding
Now you want to add Texture to all flat surfaces of the table, to do this give the whole board a coat of slightly diluted PVA Glue, then sprinkle the sand over the top. You can be as heavy handed with the sand as needed at this stage.
Once the PVA is dry (allow overnight) use a stiff brush (`I used one from a dustpan) to brush away all excess sand. Be thorough as there is nothing worse than loose sand after you paint it
Floating Rocks
While the sand on the base board dries, take one of the extra boards and cut out the shape of the craters on the base board, then on one side carve a new crater and on the other side cut the edges off onba 45 degree andle to create a rough hacked up rock look to the underside of the floating rocks. Do the same edging process around the craters on the top as we did on the bottom.
While the sand on the base board dries, take one of the extra boards and cut out the shape of the craters on the base board, then on one side carve a new crater and on the other side cut the edges off onba 45 degree andle to create a rough hacked up rock look to the underside of the floating rocks. Do the same edging process around the craters on the top as we did on the bottom.
Make Them Float
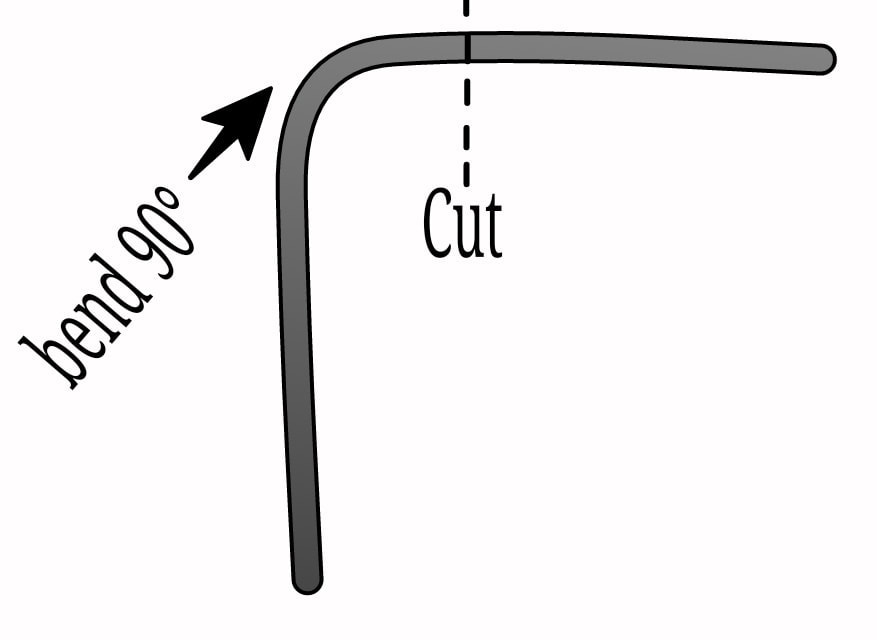
Here is where the magic comes in, take the Alluminium rods and bend them to a 90 degree angle, then cut them once just below the bend. This should give you a long rod with the very end curved 90 degrees then cut.
Here is where the magic comes in, take the Alluminium rods and bend them to a 90 degree angle, then cut them once just below the bend. This should give you a long rod with the very end curved 90 degrees then cut.
To make the rocks float simply drill a small hole in the base foam and in the side of the floating rock, then fill the holes with hot glue and while it is still hot insert the long end of the aluminium rod into the base board and the shor end into the floating rock. Then simply run a few strings of hot glue over the aluminium rod to create a waterfall looking effect.
Do not worry if the hold feels weak, once we apply the resin all the joins will become super strong.
Do not worry if the hold feels weak, once we apply the resin all the joins will become super strong.
Step 3 - Painting The Basecoat
This is the easiest step, now that all the sand is dry and you have added your floating rocks it is time to spray the entire board black. Be sure to use water based spray as regular spray will destroy the foam. Basecoat the entire board black then hit it with light, patchy coverage with a few different greys. Once this dries you can give the whole board a light drybrush focusing on the rocky features.
This is the easiest step, now that all the sand is dry and you have added your floating rocks it is time to spray the entire board black. Be sure to use water based spray as regular spray will destroy the foam. Basecoat the entire board black then hit it with light, patchy coverage with a few different greys. Once this dries you can give the whole board a light drybrush focusing on the rocky features.
Step 4 - The Bood
Now it is time to apply your blood, depending on the brand / type of resin / water effects you use it is time to mix it up and apply the blood.
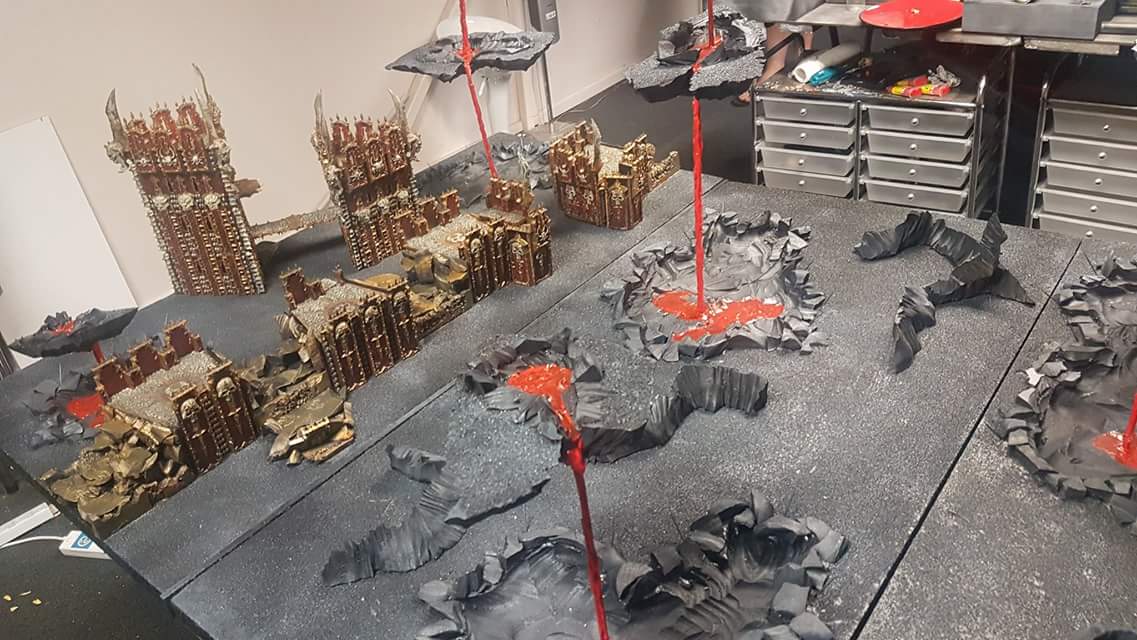
I used a 2 part epoxy glue as my blood, once mixed up you apply it with a spatula and it dries rock hard. Start by pooring some in the deepest parts of the craters you created on your floating rocks, then work your way towards the aluminium rods you used to suspend the rocks.
Give the aluminium rods a good coat as well as the area of the base boards they connect to, this stuff will run, pool and generally go everywhere, but that is ok.... we want blood everywhere!
Most Epoxys and resin mixes take a minimum of 12 hours to dry so I recommend leaving this overnight to dry to be safe. Another tip is to poor some in a disposable cup at the same time as you apply it to the table. This way you can check if it dry without touching the board.
Now it is time to apply your blood, depending on the brand / type of resin / water effects you use it is time to mix it up and apply the blood.
I used a 2 part epoxy glue as my blood, once mixed up you apply it with a spatula and it dries rock hard. Start by pooring some in the deepest parts of the craters you created on your floating rocks, then work your way towards the aluminium rods you used to suspend the rocks.
Give the aluminium rods a good coat as well as the area of the base boards they connect to, this stuff will run, pool and generally go everywhere, but that is ok.... we want blood everywhere!
Most Epoxys and resin mixes take a minimum of 12 hours to dry so I recommend leaving this overnight to dry to be safe. Another tip is to poor some in a disposable cup at the same time as you apply it to the table. This way you can check if it dry without touching the board.
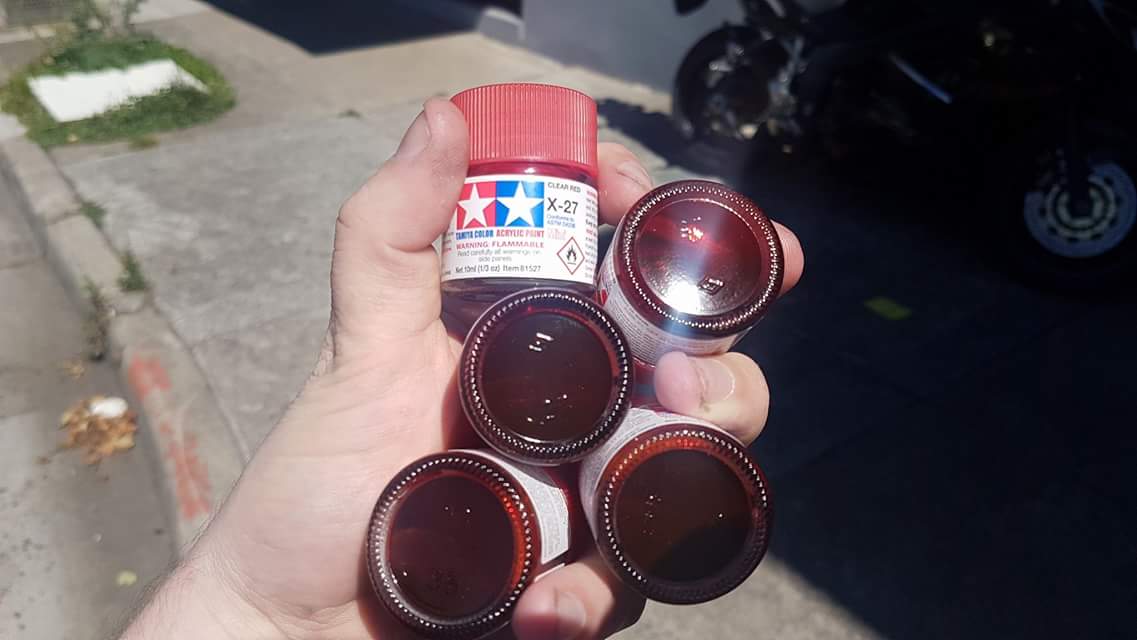
Once dried simply coat all areas of blood with Tamiya Clear Red, it is the best blood effect I have ever seen. Be messy with your application to create a violent feel to the blood splatters, cover some areas of the foam / rock with this red paint too, the resin will look like pooled blood but there is nothing wrong with a few blood splatters too!
